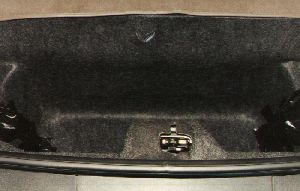
| Shown here is a view of the hatch area prior to laying the fiberglass
shell of the subwoofer enclosure. This particular vehicle is equiped
with t-tops which led to the removal of the t-top storage racks In
this photo you can see that the mounting bolts were covered to prevent
the fiberglass from forming around them and locking the shell into place.
|
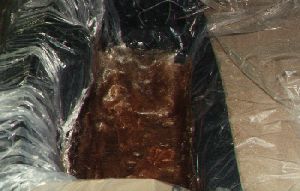
| Shown here is a view of the hatch area after laying a plastic drop
cloth and having laid a layer of fiberglass into the storage well.
|
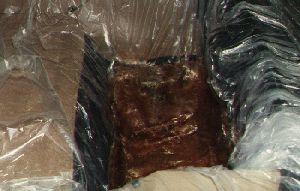
| Shown here is another view of the fiberglass laying process. Overall
close to 3 gallons of fiberglass resin and several square feet of
fiberglass mesh were used in the construction of the subwoofer encolsure.
|
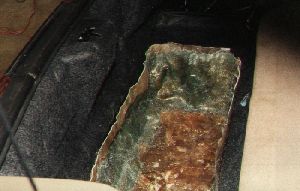
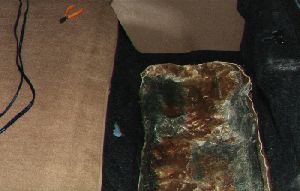
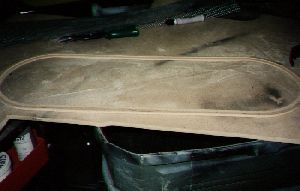
| Shown here is a view of the subwoofer enclosure shell after laying
2-3 layers of fiberglass and trimming the top edges.
|
| Shown here is another view of the subwoofer enclosure shell.
|

| Shown here is a view of the subwoofer enclosure with a sheet of 3/4
inch MDF and the three 10 inch Petras Hyperthrow dual voice coil
subwoofers in place to test for fit before the MDF was fiberglassed
onto the subwoofer enclosure shell.
|

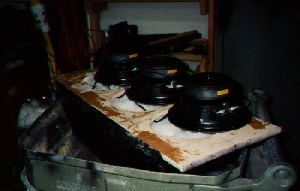
| Shown here is the process of measuring the final volume of the subwoofer
enclosure. Packing peanuts were used to fill the enclosure via a
pre-determined volume box used as a 'measuring cup'. Final enclosure
volume was calculated to be approximatly 1.56 cubic feet.
|
| Shown here is the subwoofer enclosure after adding polly-fiberfill. The
enclosures calculated volume is approximatly 1.56 cubic feet. The three
10 inch subwoofers use a total of about .18 cubic feet of airspace. With
the pollyfill added the subwoofers see a volume of approximatly 1.58 cubic
feet, manufacturer specs called for 1.5 cubic feet for the three woofer
setup. The subs are dual 6-ohm voice coil, they are wired to present a
4-ohm load to the amp.
|
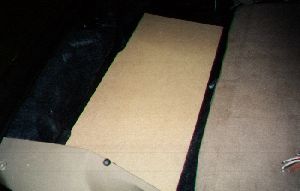
| Shown here is a view of the subwoofer enclosure in place with a piece of
1/4 inch wood that has been cut to the shape of the vehicle body panels
on top which will be used as a trim ring ontop of the subwoofer enclosure.
|

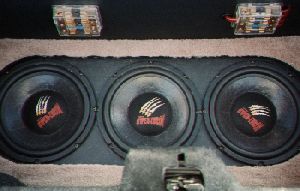
| Shown here is a view of the subwoofer enclosure with the trim board in
place after vinyl was added. A layer of silicone sealant was placed
between the subwoofer enclosure and the trim board. The subwoofers
were then screwed into place directly onto the vinyl trimboard.
|
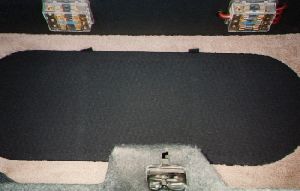
| Shown here is the subwoofer enclosure installed with a piece of
carpeted 1/2 inch MDF added as final trim. The cutout from the
1/2 MDF board will later be used for manufacturing the subwoofer grill.
|
| Shown here is the section of wood which was previously removed
from the carpeted trim panel over the subwoofer enclosure. The
board was cut again to create a ring.
|
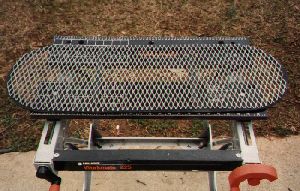
| Shown here is a view of the metal mesh that was cut to the shape
of the ring before using bondo to fasten the mesh and wood ring together.
|
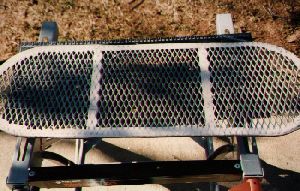
| Shown here is a view of the subwoofer grill after the metal mesh and
wood ring were joined with bondo.
|
| Shown here is the subwoofer grill in place complete with grill cloth.
|
|
This site is designed for a resolution of 800X600 or higher.
|